Today I'll talk briefly about how you could turn your web site into a simple iOS application using UIWebView.
If you are familiar with how these things work, you've probably wondered how difficult is it to make the transition if all you are looking for as basic functionality?
The answer is not much. In fact this will be extremely helpful for a web developer who has zero experience with Objective-C code!
Difficulty: Basic
1. Lets start by creating a new Single View Application project on Xcode. For this example I'll be working with iPad only and naming it SimpleWebViewer but you may chose the universal option if you want to allow for iPhone as well.
2. Go to your Storyboard and add a new Web View to your View Controller. This is really all you need if you were to think of an HTML5 app as a simple website, all you need to do is not have an address bar.
3. Next you'd want to activate the Editor option to view your storyboard alongside the code of your .h file.
After doing this you want to select the UIWebView then hold your "control" key and drag it to your code. You will see a blue line. This will create the property outlet for you.
When prompted, simply chose a name for your UIWebView and click connect.
NOTE: If you are doing an iPhone and iPad version, you will have 2 storyboards. Simply do these steps from both of your storyboards and make sure to point the blue line to the same property outlet on the code.
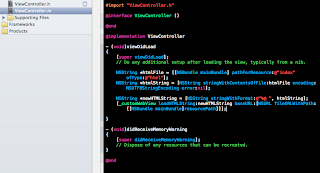
4. Now go to your ViewController.m and add the following code to your (void)viewDidLoad method
NSString *htmlFile = [[NSBundle mainBundle] pathForResource:@"index" ofType:@"html"];
NSString *htmlString = [NSString stringWithContentsOfFile:htmlFile encoding:NSUTF8StringEncoding error:nil];
NSString *newHTMLString = [NSString stringWithFormat:@"%@ ", htmlString];
[_customWebView loadHTMLString:newHTMLString baseURL:[NSURL fileURLWithPath:[[NSBundle mainBundle]resourcePath]]];
This simply takes care of assigning your index.html file to the browser as soon as the application loads.
Next we want to handle the rest of the animations and rotation, simply add the following code to your ViewController.m:
- (void)viewDidUnload
{
[self setCustomWebView:nil];
[super viewDidUnload];
// Release any retained subviews of the main view.
// e.g. self.myOutlet = nil;
}
- (void)viewWillAppear:(BOOL)animated
{
[super viewWillAppear:animated];
}
- (void)viewDidAppear:(BOOL)animated
{
[super viewDidAppear:animated];
}
- (void)viewWillDisappear:(BOOL)animated
{
[super viewWillDisappear:animated];
}
- (void)viewDidDisappear:(BOOL)animated
{
[super viewDidDisappear:animated];
}
- (BOOL)shouldAutorotateToInterfaceOrientation:(UIInterfaceOrientation)interfaceOrientation
{
// Return YES for supported orientations
return (interfaceOrientation != UIInterfaceOrientationPortraitUpsideDown);
}
5. Now that we are done with the the iOS wrapper for your application, you would want to add your HTML code to your application. Simply select your project and right click (or control+click) and find the option to Add Files to your project.
Locate and include the folder where your website code is. Make sure you have selected the option that says "Copy items into destination group's folder (if needed)". Now you will see a new group on your project navigation with all of your website files.
6. Now we gotta handle your javascript files. By default, Xcode will try to compile your javascript files. To prevent this, simply click on your target project and go to the tab called "Build Phases"
Under "Compile Sources" find your javascript files and delete them using the "-" sign. After this, go down to the section called "Copy Bundle Resources" and click on the "+". This is where you want your javascript files to be. Select your files and click Add.
Done!
You have just created a standalone HTML app for iOS.
Important things to note:
- This is a very basic and quick tutorial that will only work for simple applications. The one down side to this is that you have to make sure your code does not redirect the user to any additional websites or they won't have a way of getting back.
- For more complex solutions and needs, you can try using PhoneGap solution or a few others.
- Also its important to note that files in your iOS project are considered as being in a single directory. So when you are linking to an image or other file inside of your HTML or CSS, simply use ("filename.extension") as opposed to ("folder/filename.extension")


.png)


